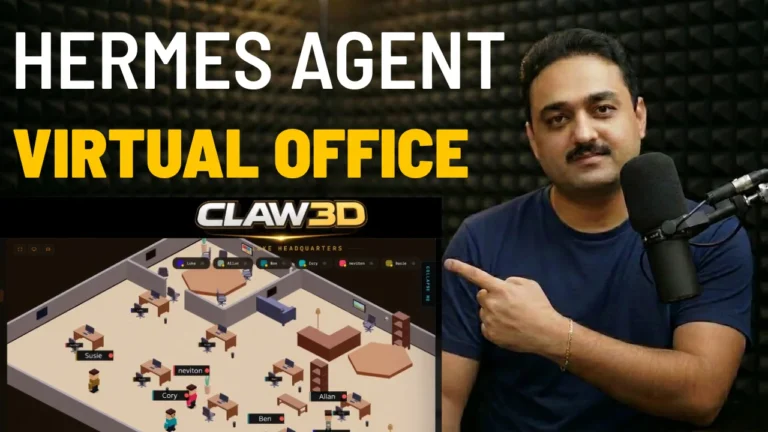
When working with autonomous AI agents like Nous Research’s Hermes Agent, developers and power users traditionally interact through raw command-line interfaces or basic tabbed chat windows. While effective for simple single-agent scripting, terminal windows fall short when you begin deploying multi-agent teams:
- How do you visualize which agent is busy, idle, or collaborating?
- How do you monitor specialized tasks without drowning in endless terminal log scrolling?
- How do you make autonomous AI workflows accessible and tangible for team members and clients?
Enter Claw3D—an open-source 3D spatial workspace designed specifically to represent autonomous AI workers as physical avatars in a virtual office building. Integrated seamlessly into the Hermes Desktop App, Claw3D transforms cold command lines into a living, interactive headquarters where your AI agents walk between desks, collaborate, and execute autonomous workflows in real time.
| Feature | Terminal CLI | Standard Chat UI | Claw3D Virtual Office |
|---|---|---|---|
| Multi-Agent Visibility | Raw JSON / text logs | Isolated chat tabs | Spatial 3D office floor & rooms |
| Agent State Monitoring | Guessing via log output | Text-only status tags | Real-time animated avatar states |
| Agent Configuration | Manual YAML / JSON editing | Basic form inputs | Interactive 7-Pillar Visual Wizard |
| Interaction Modalities | Typed terminal commands | Text messaging | Click-to-chat, file upload & voice mic |
Prerequisites: What You Need Before Getting Started
Before launching your 3D virtual office, make sure you have the following installed:
- Hermes Desktop App Installed: If you haven’t set up the desktop application yet, follow my complete setup guide on How to Install the Hermes Agent Desktop GUI App on Windows 11.
- Local Hermes Agent Runtime: Ensure Hermes is configured locally. You can run it with local LLMs (see my guide on Running Hermes Offline with LM Studio and Qwen) or with cloud endpoints via OmniRoute.
- Hardware Acceleration Enabled: A standard modern laptop or desktop GPU with WebGL hardware acceleration enabled.
Step 1: Navigating to the Office Tab & Installing Claw3D
The developers of Hermes Desktop have made installing the Claw3D 3D engine a clean, single-click process:
- Launch the Hermes Desktop App on your computer.
- In the left navigation sidebar, locate the navigation icons. Below your standard Chats icon, click on the Office tab (represented by a building/office icon).
- On the main panel, you will see the Claw3D launch screen with an Install Claw3D button.
- Click Install Claw3D. Hermes Desktop will automatically download and unpack the necessary 3D assets, Three.js shaders, and sprite libraries into your local application cache.
- Once the installation completes, the button in the top-right corner will update to Start. Click Start to initiate the 3D office viewport.
Step 2: Connecting the Hermes Backend Gateway
When launching Claw3D for the first time, you may see an alert stating: No local gateway found. This simply means the 3D visual frontend needs to bind to the active Hermes Agent server process running on your machine.
- In the gateway selection prompt, click the dropdown menu and select Hermes Backend.
- Within 2 to 3 seconds, the connection handshake completes.
- Look at the top-right status bar: you will see a green indicator displaying Hermes Connected.
- The 3D camera will smoothly zoom into your virtual office floor plan.
Step 3: Exploring the 3D Virtual Workspace & Building Directory
Once connected, your virtual office renders a clean isometric floor plan complete with desks, computer workstations, ambient office lighting, and partitions:
- The Building Directory (Left Panel): Lists your building structure, current floors (Floor 1), active rooms, and deployed agents.
- The Active Agent (Hermes): By default, your primary Hermes agent is already stationed on the floor. You will see its 3D avatar actively walking between stations, typing at desks, or standing idle depending on whether it is processing instructions.
- Camera Controls:
- Rotate / Orbit: Click and drag with the left mouse button to inspect the room from any angle.
- Pan: Click and drag with the right mouse button to move across the floor.
- Zoom: Use the mouse scroll wheel to zoom in on individual agent workstations.
Step 4: Building Custom Autonomous Agents (The 7-Pillar Wizard)
The true power of the virtual office comes when you expand beyond a single worker to build a specialized AI workforce. Claw3D provides a comprehensive visual wizard that configures the agent’s underlying system prompts, capabilities, and autonomy.
Click the Add Agent (+) button in the Building Directory to open the agent builder wizard:
- Profile & Identity: Give your agent a distinct role (e.g., DevOps Lead, Lead Research Analyst, SEO Writer), set communication vibes, and choose a unique 3D avatar appearance.
- Soul & Core Guardrails: Define your agent’s fundamental operating principles. Establish Truths (unshakeable project facts) and Boundaries (strict operational guardrails).
- Rules & Daily Habits: Establish task priority weighting, execution constraints, and behavioral rules.
- Persona & Timezone: Assign username, preferred nickname, pronouns, operational timezone, and custom System Context instructions.
- Tool & Capability Assignment: Toggle specific execution capabilities, including Shell/Terminal execution, web search scraping, and file system read/write permissions.
- Memory & State Retention: Configure durable factual memory, past decision logs, and user preference retention across sessions.
- The “Heartbeat” (Autonomous Scheduled Tasks): Define an automated checklist of periodic cron tasks that the agent executes independently in the background (such as automated health checks, git PR reviews, or data pipeline monitors).
Click Finish Wizard. Your new agent is saved and immediately materializes as a new 3D avatar on your office floor!
Step 5: Interacting & Collaborating with Your 3D Workforce
Once your agents are stationed at their desks, communicating with them is effortless:
- Direct Click-to-Chat: Click directly on any agent’s 3D avatar in the virtual room. An interaction panel slides out from the right.
- Multi-Modal Communication:
- Text Messaging: Type tasks and questions just like a standard chat interface.
- File Attachments: Click the paperclip icon to upload code files, spreadsheets, or PDFs for the agent to review.
- Real-Time Voice Chat: Toggle the Microphone (Mic) icon. You can speak naturally to your agent; Hermes will process your voice query, execute the task, and respond with synthesized voice feedback.
- Multi-Agent Collaboration: Switch between agents by clicking different desks. You can assign the research phase to your Research Agent, then have your DevOps Agent review the implementation—all within the same visual room.
Step 6: Managing & Deleting Agents
As project requirements change, maintaining your office is simple:
- Edit Agent: Click any agent in the Building Directory to adjust its tool privileges, update its heartbeat schedule, or refine its soul boundaries.
- Delete Agent: If a temporary agent’s task is completed, click Delete inside the agent settings. The avatar will disappear from the 3D room, freeing up floor space and system memory.
Related Local AI Guides & Productivity Workflows
- Install Hermes on Windows: Step-by-step setup in my guide on How to Install Hermes Agent on Windows 11 Without WSL.
- Hermes Desktop GUI Setup: Master the desktop client with How to Install the Hermes Agent Desktop GUI App on Windows 11.
- Run 100% Offline with LM Studio: Eliminate cloud API costs using How to Run Hermes AI Agent Completely Offline with LM Studio and Qwen.
- Free Cloud API Routing: Never hit rate limits by pairing Hermes with OmniRoute AI Routing.
- Free Online Browser Tools: Check out our client-side PDF Tools and Image Tools.
Frequently Asked Questions (FAQ)
Does Claw3D run completely local on my machine?
Yes. The Claw3D visual engine and the Hermes Desktop application run 100% locally on your computer. If you connect it to a local LLM runtime (like LM Studio or Ollama), your entire multi-agent virtual office operates completely offline with zero data leaving your PC.
What hardware do I need to run the 3D virtual office?
Any modern PC running Windows 10 or Windows 11 with integrated or dedicated graphics that supports WebGL 2.0 can render Claw3D smoothly at 60 FPS. It consumes minimal additional GPU resources beyond standard browser rendering.
Can I run Claw3D with multiple floors?
Yes! As your AI workforce grows, you can add additional floors and custom room layouts directly from the Building Directory panel.
Is Claw3D open source?
Yes. Claw3D is an open-source project created by Luke (github.com/iamlukethedev/claw3d) and integrated directly into the open-source Hermes Desktop client by Fathah (github.com/fathah/hermes-desktop).
Summary & Next Steps
Claw3D represents the future of autonomous agent orchestration—moving beyond isolated terminal tabs into visual, spatial, and collaborative environments. By giving your AI workforce identity, visual presence, and autonomous heartbeat routines, you gain total clarity over your automated workflows.
- Watch the Complete Setup Video: Hermes Agent Virtual Office | Install Claw3D
- Subscribe for More AI Automation Guides: Umair Alam on YouTube