
By default, Windows 10 only allows one Remote Desktop (RDP) session at a time. If a second user tries to connect, the first user gets disconnected. But what if you need multiple users to access the same computer simultaneously?
In this guide, you will learn how to enable multiple RDP sessions on Windows 10 — useful for teams, shared workstations, and remote collaboration.
Why Enable Multiple RDP Sessions?
- Team collaboration — Multiple team members can work on the same machine
- Shared workstations — Save costs by sharing powerful computers
- Remote support — IT admins can assist users without disconnecting them
- Training — Instructors can demonstrate while students follow along
The Method: Using RDP Wrapper (Free)
Step 1: Create Multiple Users in Windows
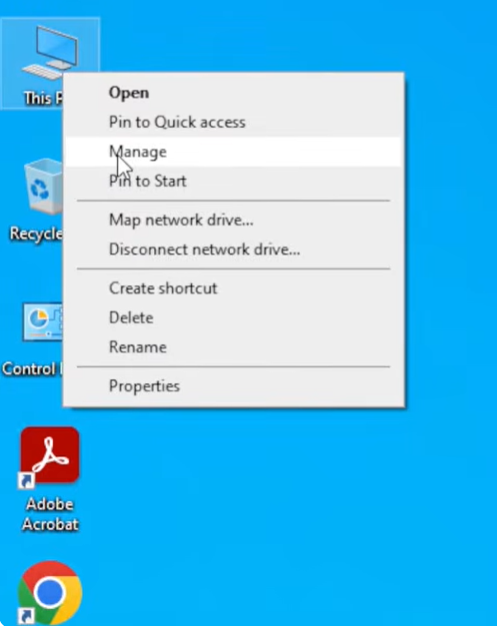
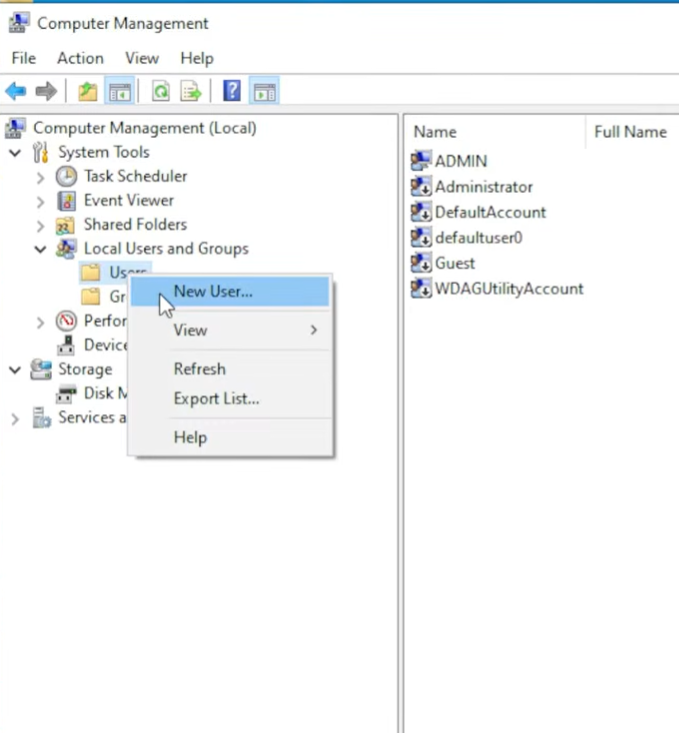
- Right-click on “This PC” and select “Manage” to open the Computer Management.
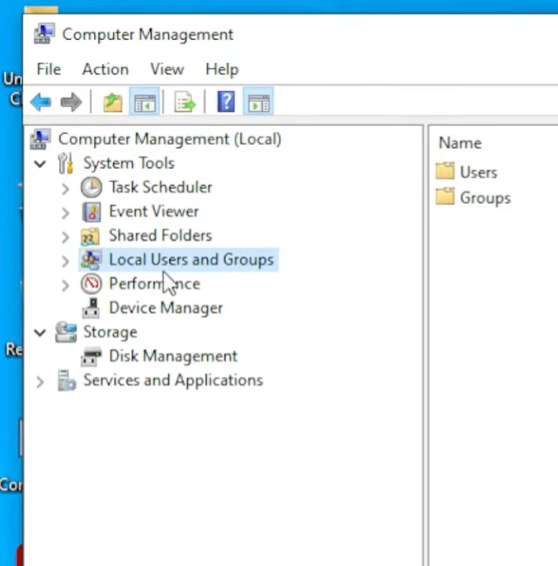
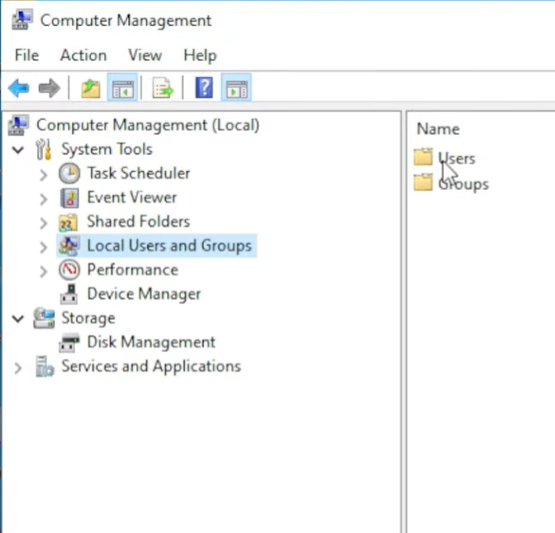
- Click on “Local Users and Groups” in the left sidebar
- Double-click on “Users” in the middle pane to open the list of local users
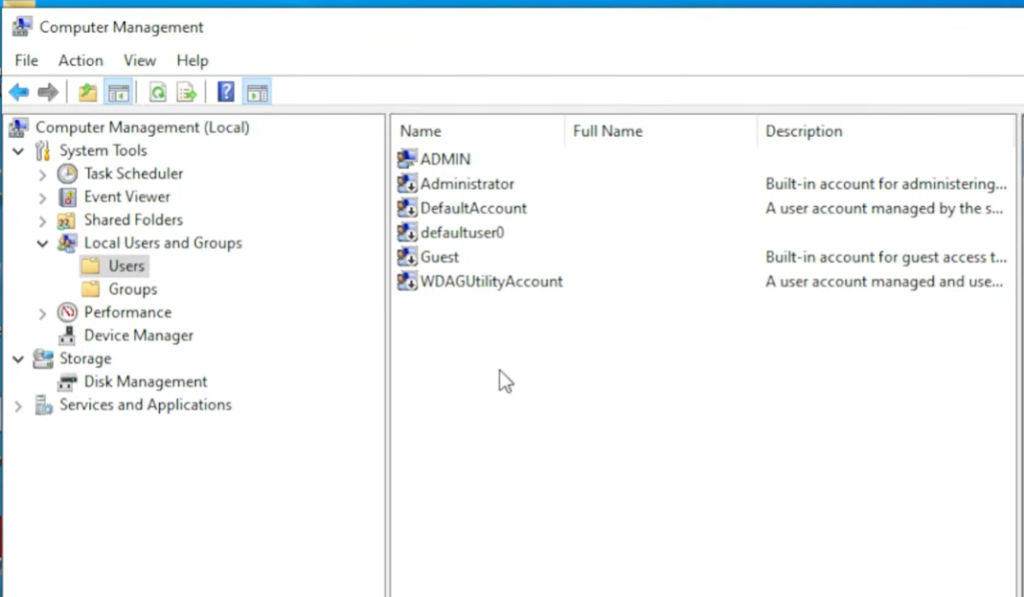
- Now, create a new user by right-clicking on “Users” either in the left sidebar or the middle pane and then on “New User…”
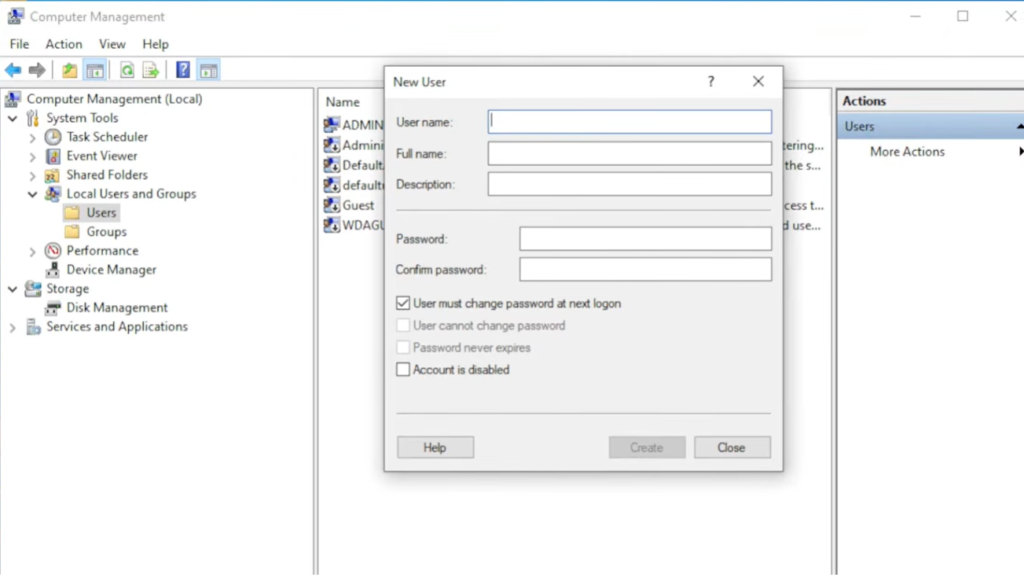
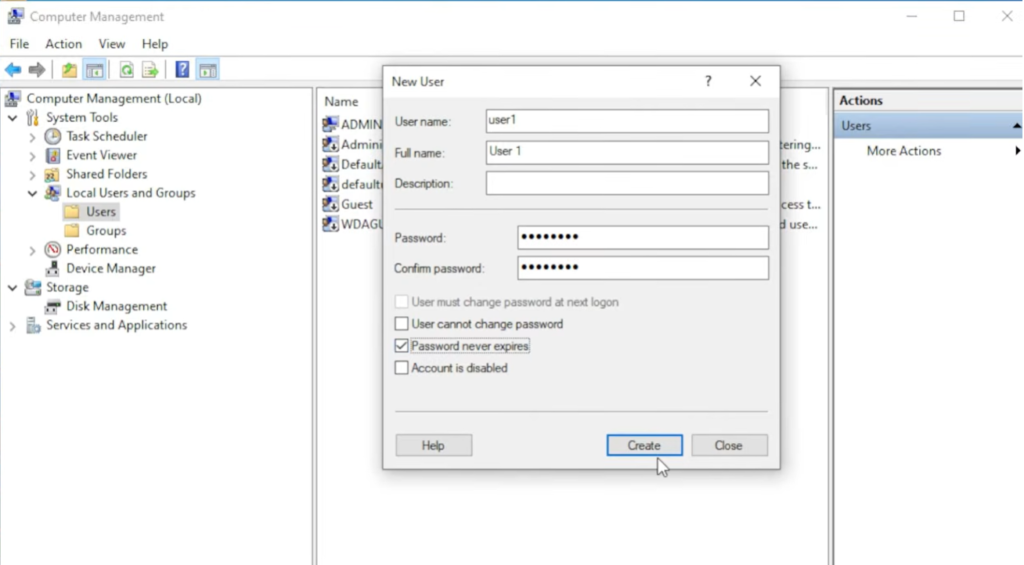
- You’ll see the New User window. Fill in the user details such as “User name”, “Full name”, and “Password”. You can leave the description empty if you want. For our test case, we will uncheck the “User must change password at next logon” and check the “Password never expires” checkboxes. Then click on the “Create” button to create the new user.
- Now, create multiple users as per your requirement
Beware not to create too many users because the more users, the more system resources will be used. So, create only as many users as you require and also make sure that you have enough system RAM and storage capacity to manage the users.
Step 2: Add New Users to RDP Security Group
Now we need to add the new users to the Remote Desktop Security group in Windows to allow them to use the remote desktop services.
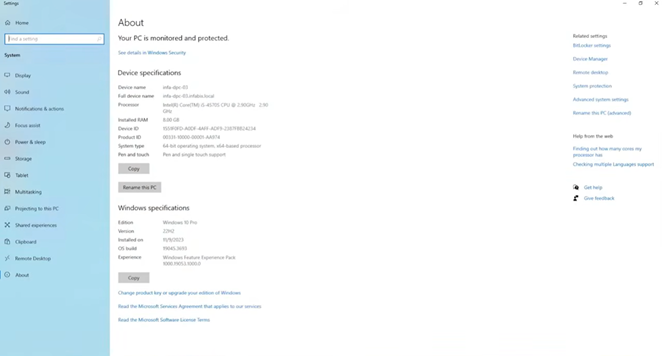
- Open system properties by right-clicking “This PC” and then “Properties”. This will open the system properties.

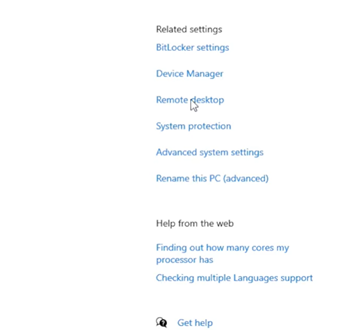
- Once you are in the system properties window, click on “Remote Desktop” from under the “Related Settings” section on the right side to open the remote desktop settings. You can also click on “System Protection”.
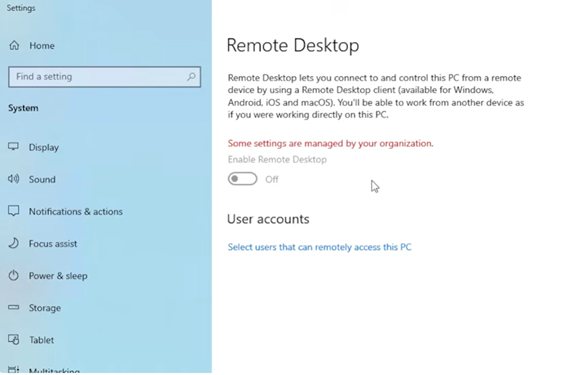
- This will open the “Remote Desktop” settings window. Toggle the “Enable Remote Desktop” button to enable the remote desktop services on the computer. If you see a red “Some settings are managed by your organization” warning, don’t worry, and just click the “Select users that can access this PC” from under the “User Accounts”.
- If you choose to get to the remote desktop settings through the “System Protection” settings, then when the system protection settings window opens, you will click the “Remote” tab to get to the “Remote Desktop Users” window.
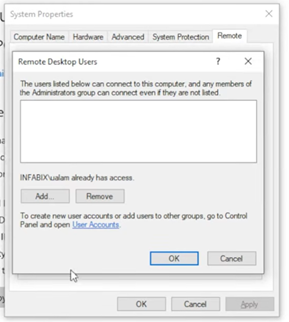
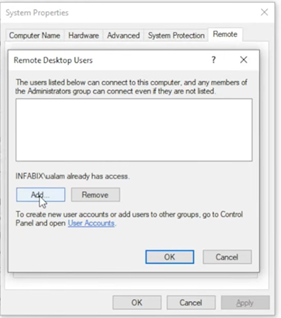
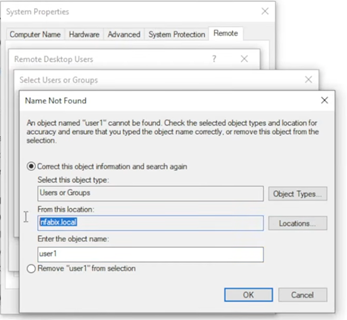
- Now, click on the Add button to open the “Select Users or Groups” window. Type in the name of a user you want to add, then click on “Check Names” button to locate the user.

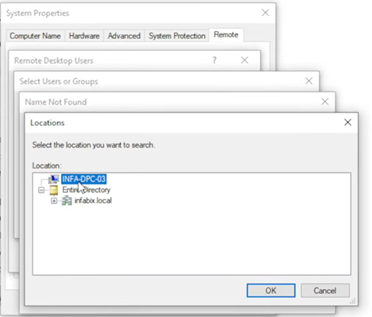
- Windows will automatically search for the user. If you see a domain under the “From this location,” this means that your computer is on a domain network. But since we created local users, we need to click on the “Locations” button again and select our local computer by clicking on the computer name. Once you do that, Windows will successfully locate and display the user. Finally click on the “OK” button to add the user to the Remote Desktop group.
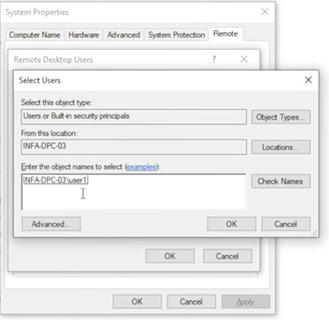
Once you have added one user, add the remaining users by following the same steps above.
Step 3: Download RDP Wrapper
- Download RDP Wrapper from GitHub (https://github.com/stascorp/rdpwrap/releases). You can download either the Microsoft Installer (.msi) file or the compressed zip file from under the “Assets” on the GitHub repository page.
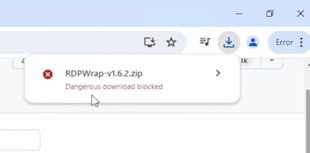
- If you are using Google Chrome, your download might get blocked with the error “Dangerous download blocked. This is a false positive. To resolve this, use another browser like Microsoft Edge or Mozilla Firefox.
- Extract the ZIP file
Step 4: Install RDP Wrapper
- Install the RDP Wrapper by running the “install.bat” Windows Batch File as Administrator.
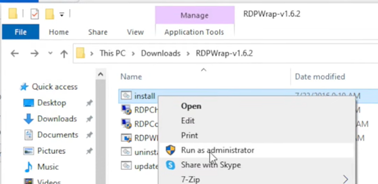
- Wait for the installation to complete. Once the installation is complete, you will see a success message.
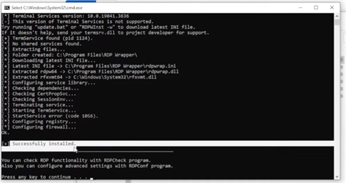
- If the installation is successful, you will see an “RDP Wrapper” folder in your Program Files folder on the Windows drive. There will be two files inside that folder: “rdpwrap.dll” and the “rdpwrap” configuration file.
Step 5: Verify Installation
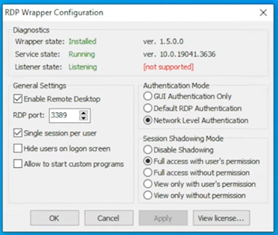
- Run RDPConf.exe as Administrator from the folder where you downloaded the RDP Wrapper.
- If you see a “not supported” red warning in the configuration window, this means that the RDPWrap version in our Windows folder, which we just installed, is not supported. So, we will have to get the supported version. You can see the supported version just above the not supported message, which in our case is 10.0.19041.3636. Most often, there’s another supported version 10.0.19041.4355.
Step 6: How to Get the Supported RDPWrap Version
- Visit the RDPWrapper GitHub page.
- Click the top heading “RDP Wrapper Library”. This will open the releases page of the repository.
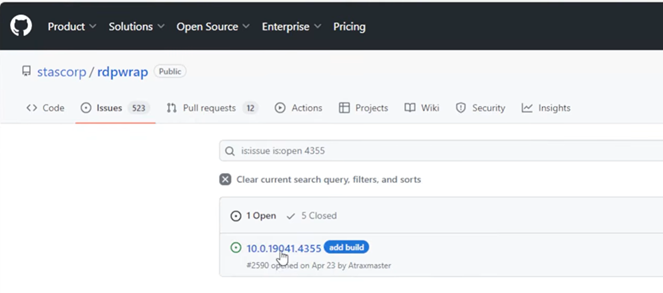
- Click on “Issues”

- Then search for your supported version; in this case, we’ll search for “4355”.
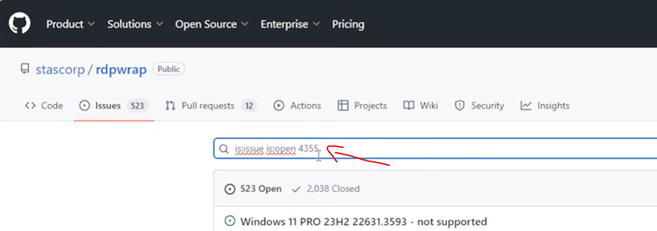
- This will list all the issues related to your supported version on the repository. Usually, there will be just one issue. Click on it.
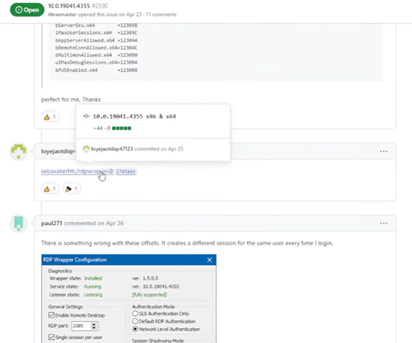
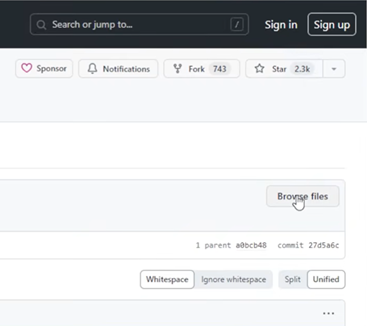
- Once you click on the issue, you will see all the comments about that issue. Here, you will have to do some searching and try to find the comment that mentions that this worked for the person who posted the comment. Usually, you will also find the link for your supported version’s file in the comments. Once you find the link for the file, click on it. This will open the raw file on GitHub. Once opened, click on the “Browse files” button on the right.
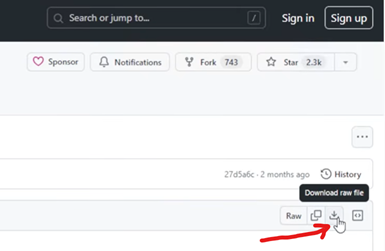
- This will open the list of files. You will find an “rdpwrap.ini” file here. This is the file for your version. Click on it, and the file will be opened on GitHub. Then click on the “Download raw file” button on the right to download the file and save it on your computer. You may get a warning from the browser that the file may harm your computer, and the download might get blocked. To resolve this, just click the 3 dots beside the warning and click “Keep”, and the file will download.
- Then replace the old “rdpwrap.ini” file in your Program Files RDP Wrapper folder with this newly downloaded file.
- Now run the RDPConf.exe as Administrator again, and you will see a “Fully Supported” message in green where you previously saw the not supported message.
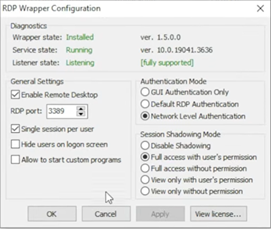
- If you want to allow the same user to log in multiple times simultaneously, just uncheck the “Single session per user” checkbox and click on the “Apply” button.
Step 7: Test Multiple Connections
- Connect from one computer via Remote Desktop
- Connect from a second computer
- Both sessions should work simultaneously
Troubleshooting
Warning: Another user is signed in. If you continue, they’ll be disconnected.
When you try to log in and see a warning, “Another user is signed in. If you continue, they’ll be disconnected. Do you want to sign in anyway?“, click “No”. This happens because, by default, Windows does not allow multiple users to sign in. To resolve this warning, we’ll have to edit the group policy in Windows. To do so, follow the steps below:
- Open the Start menu and search for “Group Policy”. You’ll see “Edit Group Policy” listed in search results. Click on it. This will open the “Local Group Policy Editor” window.
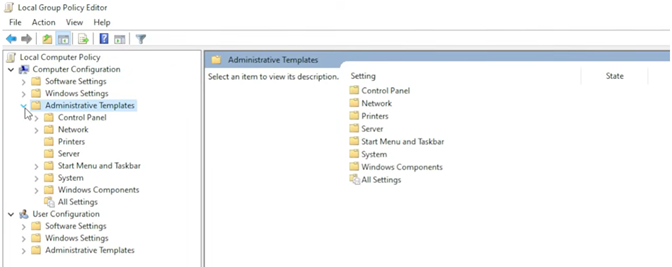
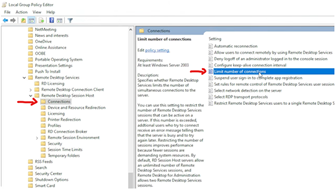
- Navigate to “Connections” from the left sidebar. You’ll find it under “Remote Desktop Session Host”. The hierarchy is as follows:
Local Computer Policy
├── Computer Configuration
   ├── Administrative Templates
       ├── Windows Components
            ├── Remote Desktop Services
                ├── Remote Desktop Session Host
                   ├── Connections
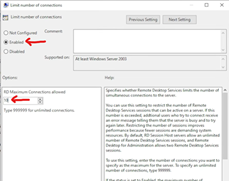
- Click on it. Then, on the right pane, open the “Limit number of connections” setting by double-clicking on it. Here, you need to first change the state from “Not Configured” to “Enabled“, and then set a number for “RD Maximum Connections allowed“. You can set it to unlimited by typing 999999, but I would recommend that you set it to a number that you want to allow (the maximum number of users that you want to allow to connect to that computer remotely). Click on the “Apply” button to apply the settings, and then on the “OK” button to close the window.
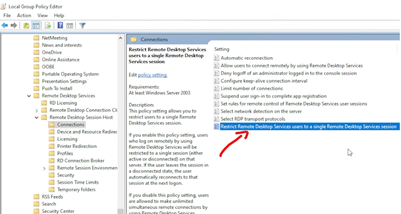
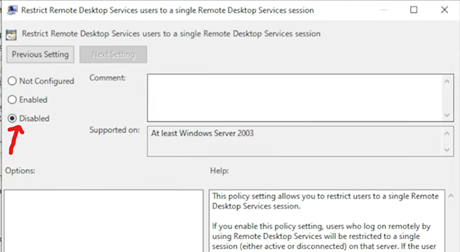
- Then we need to change another setting, which is “Restrict Remote Desktop Services users to a single Remote Desktop Services Session“. You need to set it to “Disabled”.
- Then we need to apply the changes we just made to the group policy by force updating it. To do so, open Windows PowerShell as administrator and run the command “gpupdate /force“. If everything goes well, you will see two success messages: “Computer Policy update has completed successfully,” and “User Policy update has completed successfully.”
- Restart your computer for the group policy changes to take effect.
- Now, when you try to sign in multiple users to this computer, every user will successfully log in.
Important Considerations
- Licensing — Windows 10 is licensed for single-user use. Multiple RDP sessions may violate the license agreement
- Performance — Each RDP session consumes RAM and CPU. Ensure your hardware can handle multiple users
- Security — Use strong passwords and consider a VPN for remote access
- Updates — Windows updates may break RDP Wrapper. Check for updates after each Windows update
FAQs:
- RDP Wrapper stopped working after a Windows update?
Download the latest version from GitHub. The community regularly updates it to support new Windows builds.
- Can I use this on Windows 11?
Yes, RDP Wrapper works on both Windows 10 and Windows 11.
Conclusion
Enabling multiple RDP sessions on Windows 10 is straightforward with RDP Wrapper. Whether you are setting up a shared workstation or enabling team collaboration, this solution provides a free way to allow multiple remote users on a single Windows machine.