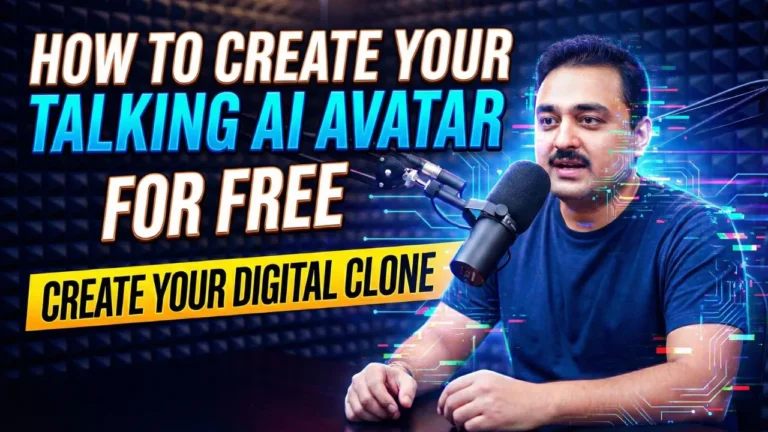
Commercial AI video platforms like HeyGen and Synthesia have made talking avatars popular, but their pricing models are painful for creators and small businesses. Paying $29 to $89 per month for a measly 15 to 30 minutes of video generation quickly drains your budget, especially when you need multiple takes or long-form tutorials. What if you could build a photorealistic talking AI clone of yourself—complete with natural blinking, head movement, and perfect voice lip-syncing—completely free without any monthly subscriptions?
TL;DR: You can create a high-fidelity talking AI avatar in minutes by chaining three powerful free AI tools: Google Whisk / Google Flow (to generate a styled, photorealistic digital twin from a single photo), an AI motion generator like Grok (to add natural head tilt, blinking, and breathing micro-movements), and Dreamface (to achieve zero-latency, phoneme-accurate lip-syncing using your own voice recording or a cloned voice). This workflow produces studio-quality talking head videos with zero watermarks or credit limits.
What You’ll Learn
- Why cloud avatar platforms like HeyGen are overpriced for independent creators
- How to transform a simple selfie into a professional avatar using Google Whisk or Google Flow
- How to customize clothing, posture, and studio backgrounds with simple text prompts
- The “Secret Trick” to prepare your avatar’s mouth for flawless lip-syncing
- How to generate subtle, realistic facial animation and micro-movements
- How to lip-sync your avatar with your own voice (or an AI voice clone) using Dreamface
- How to export high-definition video ready for YouTube, TikTok, and online courses
The Free AI Avatar Workflow at a Glance
| Stage | Tool Used | Purpose | Cost |
|---|---|---|---|
| 1. Avatar Generation | Google Whisk / Google Flow (or Leonardo.ai) | Turns your photo into a stylized, photorealistic character in a studio setting | 100% Free |
| 2. Micro-Movement | Grok / Image-to-Video AI | Adds natural breathing, eye blinking, and realistic head tilts | Free Tier / Unlimited |
| 3. Voice Audio | Your Microphone or Qwen3-TTS | The spoken dialogue audio track | 100% Free |
| 4. Lip Synchronization | Dreamface | Matches mouth shape and phonemes to your spoken audio | Free |
| 5. Commercial Comparison | HeyGen / Synthesia | Paid baseline alternative ($29 – $89/month) | Expensive |
Why Chaining Free Tools Beats HeyGen
While HeyGen offers a convenient all-in-one button, it comes with severe restrictions:
- Strict Minute Caps: A starter plan gives you roughly 15 credits. If you mess up a script or want to re-render, your credits are gone forever.
- Expensive Upgrades: If you run a YouTube channel or produce regular tutorials, you quickly hit enterprise tiers costing over $1,000/year.
- Rigid Backgrounds: Commercial platforms make changing outfits, scenes, or lighting complicated.
By combining Google Whisk/Flow and Dreamface, you get unlimited video exports, total control over your avatar’s wardrobe and camera angles, and zero recurring credit card bills.
Step 1: Generate Your Base Digital Clone
The foundation of a convincing avatar is a sharp, high-resolution portrait that accurately captures your facial structure while looking professionally lit.
💡 2026 Tool Update (Google Whisk ➔ Google Flow):
Google has transitioned its experimental Whisk project into Google Flow (Google Labs). The exact same character styling, background replacement, and prompt-blending workflow shown in my video now lives directly inside Google Flow. Alternatively, you can use any free modern AI image generator (like Leonardo.ai, SeaArt, or Bing Image Creator) to generate your base studio portrait!
The Portrait Generation Workflow:
- Upload Your Reference Photo: Take a clear, front-facing selfie in good lighting and upload it as the subject image in Google Flow / Whisk.
- Select Scene & Background: Instead of a messy bedroom or plain wall, provide an image prompt or reference photo for your dream setup—such as a modern tech studio with neon accent lights, a cozy home office with bookshelves, or a minimalist corporate boardroom.
- Customize Your Outfit: In the prompt box, specify your desired attire (e.g., “Wearing a casual black crewneck t-shirt”, or “Tailored navy blue blazer with a crisp white shirt”).
- Generate: The AI blends your facial likeness with the lighting, wardrobe, and scene reference, producing a studio-grade 4K portrait. Pick the sharpest, most lifelike render and download it.
Step 2: The “Secret Trick” for Natural Lip-Syncing
Most creators fail at AI avatars because their base image has an open-mouth smile, showing teeth or an asymmetrical smirk. When lip-sync software forces an open mouth to speak, it produces jarring, unnatural distortions.
To get television-quality lip syncing, apply this Pre-Processing Golden Rule:
- Neutral, Closed-Mouth Expression: Ensure your base image has lips gently closed in a relaxed, neutral expression.
- Front-Facing Head Angle: The face should be looking straight into the camera (or at a very subtle 5-degree angle).
- Clear Jawline: Avoid hands touching the face, heavy scarves, or high collars covering the chin.
When an image starts with a clean, closed mouth, modern lip-sync algorithms can stretch, open, and articulate consonants (B, P, M) and vowels (A, O, E) with near-perfect realism.
Step 3: Animate Natural Head & Eye Movement
Static photos that only move their lips look robotic. Human speakers constantly tilt their heads, blink, and make subtle breathing movements.
- Take your generated portrait and import it into an image-to-video tool like Grok (or free tiers of Runway / Kling).
- Use a subtle motion prompt:
“Subtle breathing, gentle natural eye blinking, slight conversational head tilt, steady camera, photorealistic 4k, static background.”
- Keep the motion intensity low (around
2or3out of 10). You only want micro-movements—not dramatic turns. - Export a 3 to 5-second video clip. This animated loop serves as your dynamic video canvas.
Step 4: Lip-Sync with Your Voice Using Dreamface
Now that you have your animated portrait, it’s time to bring it to life with speech:
- Prepare Your Audio Track:
- You can record your voice directly using a USB microphone, OR
- Use an AI voice clone created with my Qwen3-TTS local voice cloning guide for a 100% automated voiceover!
- Ensure your audio is exported as a clean
.wavor.mp3with no background hiss.
- Open Dreamface: Upload your base portrait image (or animated loop) and your recorded speech audio file.
- Select Lip-Sync Mode: Choose the High-Definition / Photorealistic mode. Dreamface will analyze the audio frequency and map your spoken phonemes to the mouth geometry frame by frame.
- Preview & Generate: Play the preview to verify speech timing. Hit Generate to render your finalized talking avatar.
Step 5: Exporting & Polishing in Your Video Editor
Once Dreamface finishes rendering:
- Download the MP4 file at maximum resolution (1080p or 4K).
- Import into CapCut, Premiere, or DaVinci Resolve:
- Overlay your screen recordings, product demos, or tutorial slides.
- Add automated auto-captions/subtitles to boost viewer retention.
- Crop the avatar to a circle or place it in the lower-right corner as a presenter cam.
Cost Comparison: Free Stack vs. Paid Services
| Expense Item | HeyGen / Synthesia | Our Free AI Workflow |
|---|---|---|
| Monthly Subscription | $29 – $89 / month | $0.00 |
| Video Generation Limit | 15 – 30 minutes / month | Unlimited |
| Custom Outfits & Scenes | Paid Add-on | Free (via Google Flow / Whisk) |
| Voice Cloning | Extra fee per voice | Free (via Qwen3-TTS / Mic) |
| Annual Cost | $348 – $1,068 / year | $0.00 |
Summary & What to Try Next
You don’t need a multi-thousand-dollar studio or expensive AI subscriptions to create professional presenter videos for YouTube, social media, or online courses:
- Generate your portrait with Google Flow or free tools like Leonardo.ai.
- Keep the mouth closed and neutral for clean animation.
- Animate subtle micro-movements with Grok.
- Lip-sync your audio with Dreamface.
To take your AI production stack even further, check out my guide on How to Clone Your Voice Locally for Free with Qwen3-TTS and explore my free Online Image and PDF Tools.
Frequently Asked Questions (FAQ)
What happened to Google Whisk?
Google Whisk was an experimental Google Labs project that has been integrated into Google Flow and Google’s updated image generation suites. You can achieve the exact same character-blending and background generation using Google Flow, or free AI tools like Leonardo.ai and Bing Image Creator.
Can I use these AI avatars commercially on YouTube and social media?
Yes. Videos created with this workflow are free from proprietary watermarks and can be monetized on YouTube, TikTok, LinkedIn, and online course platforms.
What is the maximum video length I can generate?
While commercial platforms cap you at 5 to 10 minutes per credit, Dreamface and local tools allow you to process audio tracks of several minutes. For long videos (15+ minutes), break your script into 2-to-3 minute chapters and stitch them together in your video editor.
What resolution does the output video support?
Base portraits generated in Google Flow/Whisk render at crisp 2K/4K resolution. When processed through Dreamface, you can export full HD (1080p), which can easily be upscaled to 4K using free upscalers if needed.